BeckerArt FLOAT-YOUR-PIGMENT Newsletter May 3rd Wet Streets

Published: Tue, 05/03/16

 
Hello 

Welcome to the FLOAT-YOUR-PIGMENT Newsletter #53 Wet Street

April Showers hopefully will be bringing in some great May flowers, and since it has been raining so much here in the midwest I want to make sure everyone knows how to paint those wet streets. 

Last weekend I had the pleasure of conducting a workshop for the Addison Art Guild in Addison IL. We had a great time learning how to paint crowds of people along with wet streets. Below you will find the demonstration/Paint-A-Long we painted. I filmed the process of painting a wet street so everyone can benefit. you can check it out below.

A reminder I will be up in Lac du Flambeau at Dillman's May 21st doing another demonstration for their Spring Open House. If you are in the area that weekend, stop on by!

YES  to class this Thursday at the Civic Center in Libertyville 
YES  to class this Saturday at The Studio in McHenry.

 
Painting Wet Streets in Watercolor
Lately, when doing demonstrations or conducting workshop I get asked "how do you paint those wet street scenes" and "can you teach us how to paint them". That is exactly what happened this last weekend as I conducted a workshop for the Addison Art Guild. The video below is the lesson I gave the students and what we learned to paint.

To create a wet street in watercolor the first thing you need to learn is how to paint wet-into-wet.
Painting wet-into-wet or what I like to call Floating-Your-Pigment teaches you to control your pigment.
You can create wet streets using soft and hard edges, but I like to teach it with soft edges first.

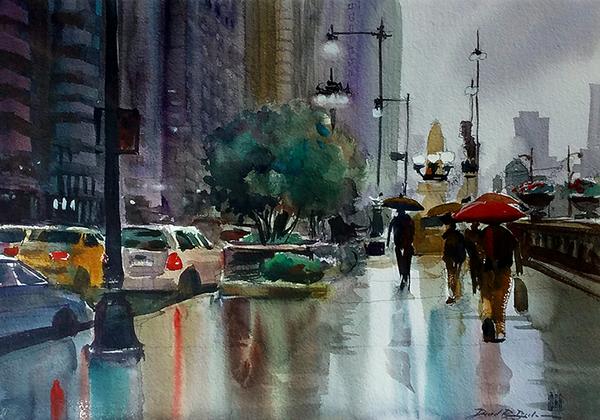
First, you wet the entire street with clear water, then do a gradation that usually goes from a light to dark and back to front. It is usually light to dark and back to front but not always, sometimes depending on the scene it can be opposite with the back being dark and the front being light, either way, do a wet-into-wet gradation.

Second, you use the color of the gradation and darken that color slightly to paint in the reflections of objects on the street or sidewalk. Don't worry about what the color of the object will be above the reflection, you can add that color into the reflection later with a tint of color over the soft edged reflections.

Keep the brush strokes of the reflection totally vertical, and they can be darker closer to the object that causes the reflection.

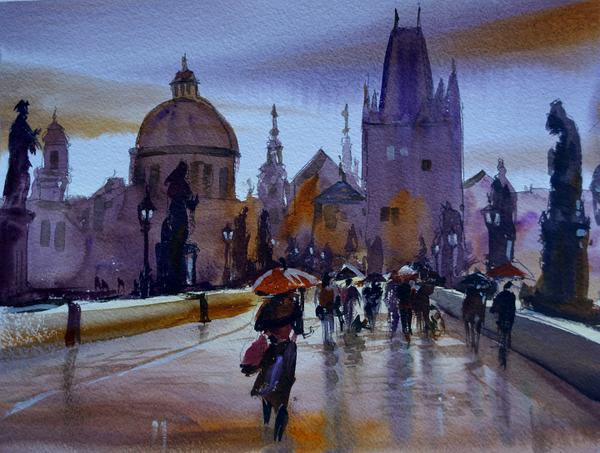
Don't confuse a shadow with the reflection, sometimes you can have both happening at the same time. You can see an example of this in the Prague Bridge painting below.

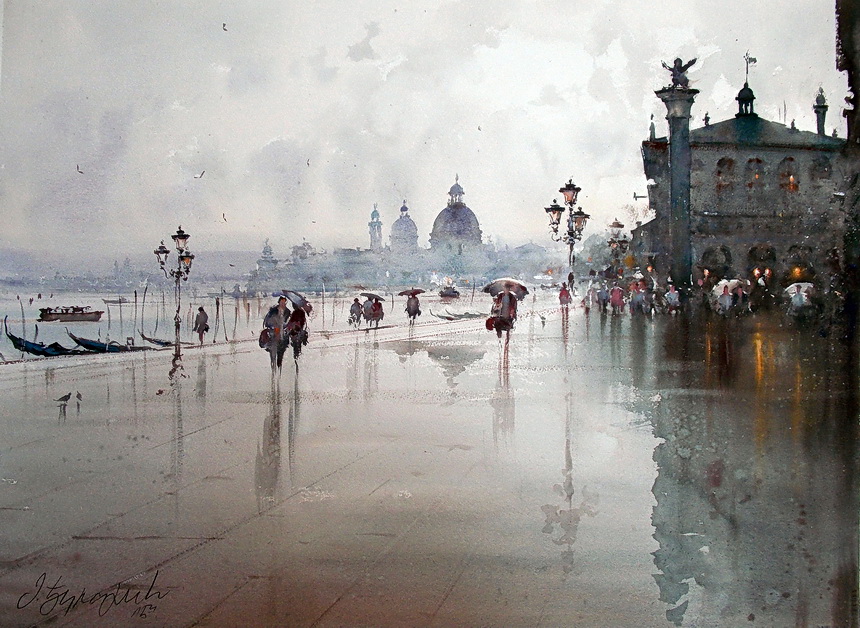
If you are looking to make the reflection hard-edged, just make sure you do it as a tint of color and try not to make it too dark and make sure to use the color of the first wash but darkened slightly.

Give both ways a shot, I tend to use both ways in the same painting as illustrated in the painting above.


Above in the painting you can see the soft reflections in the street under the people. There is also a hard edge reflection over the soft edge and there is also a shadow being caused by the light coming from the right.
 
Sign-up for my Dillman's 2016 BeckerArt Workshops
 
Watercolor Artist of the Week
Each week I will be bringing you an artist that I admire and that amazes me. I hope these artists will amaze and inspire you to keep on painting and develop your own style as much as they inspire me.

Now here is a painter that really knows how to paint wet streets..... Beautiful!

 
Link of the Week
Storybird, An innovative publishing
experience for professional artists.
Earn royalties. Keep your copyright.
Get exposure to our community of millions.
 
BeckerArt Brushes 

Get your amazing Superior Synthetic Blend  BeckerArt Brushes today.

1 1/4" Flat Series 020, #16 Round and a #4 Rigger Holbein Gold, Short Handle, Superior Synthetic Blend Watercolor Brushes. Made to my specifications, which were, The point of the 1 1/4" flat brush and the # 16 round had to come to a razor sharp point, along with a bounce back to straight action when applying watercolor to paper. The # 4 Rigger had to be the perfect length, the perfect thickness and the perfect point.

Click Here to Purchase​​​​​​​

 
Artwork Archive.com and get 20% off your first year. 
It's time to get your artistic life organized.
They also have a great newsletter about the art business when you sign up.
 
 For any other info please email me at david@davidrbecker.com